Installing and Configuring Monitoring Agents
Deploying a monitoring agent involves creating the agent configuration in the portal, obtaining authentication credentials, deploying the container in your environment, and assigning the agent to monitoring profiles.
Creating an Agent
Navigate to Account ➡️ Agents and click the Add Agent button. The Display Name field identifies the agent in your agents list and profile configurations. Use descriptive names that indicate the agent's location or purpose, such as "US-East Datacenter", "Production VPC", or "Internal Network Agent".
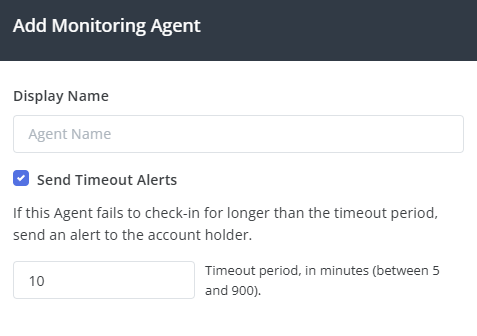
The Send Timeout Alerts option enables alerts if the agent fails to check in for longer than the configured timeout period. The timeout value can be set between 5 and 900 minutes. Enable this setting to receive notifications if the agent stops running or loses connectivity. After creating the agent, click View Settings to display the authentication environment variables.

Authentication Credentials
The portal provides two environment variables that must be configured in your container deployment:
GENERATOR_AGENT_SID- The unique agent identifierGENERATOR_AGENT_TOKEN- The authentication token
Copy these values and configure them as environment variables in your container orchestration platform. These credentials authenticate the agent to the Generator Labs platform and should be kept secure.
Optional Environment Variables
In addition to the required authentication credentials, the agent supports the following optional environment variables:
GENERATOR_AGENT_MODE
Controls whether the agent process runs continuously or exits after a single check-in. Accepted values are PERSISTENT (default) and SINGLE.
PERSISTENT— The agent runs indefinitely, maintaining a continuous connection to the platform. Use this for standard deployments where the container stays running.SINGLE— The agent performs one check-in and then exits. Use this when running the container as a scheduled task (e.g., a Kubernetes CronJob or ECS scheduled task) rather than a long-running service. This lets you reduce costs by running the agent only a few times per day.
When GENERATOR_AGENT_MODE is set to SINGLE, the platform records this and will not send timeout alerts for those agent instances, since they are expected to stop after each run.
GENERATOR_AGENT_PROXY
An optional proxy URL in standard curl format used to route outbound agent communication back to the Generator Labs platform. This only applies to the agent's communication with the platform — it does not affect the agent's internal monitoring connections to your endpoints.
GENERATOR_AGENT_PROXY=http://user:password@proxy.example.com:3128
Deploying the Agent Container
The monitoring agent container image is available from the Generator Labs GitHub repository. The agent runs in Docker containers and can be deployed to Kubernetes, AWS ECS, or standalone Docker environments. Detailed deployment instructions and example configurations are provided in the repository documentation.
Kubernetes Deployment Example:
apiVersion: apps/v1
kind: Deployment
metadata:
  name: generatorlabs-agent
spec:
  replicas: 2
  template:
    spec:
      containers:
      - name: agent
        image: ghcr.io/generator-labs/agent:latest
        env:
        - name: GENERATOR_AGENT_SID
          value: "your_agent_sid"
        - name: GENERATOR_AGENT_TOKEN
          value: "your_agent_token"
Docker Compose Example:
version: '3'
services:
  agent:
    image: ghcr.io/generator-labs/agent:latest
    environment:
      - GENERATOR_AGENT_SID=your_agent_sid
      - GENERATOR_AGENT_TOKEN=your_agent_token
    restart: unless-stopped
Docker Command Example:
docker run -d \
  -e GENERATOR_AGENT_SID=your_agent_sid \
  -e GENERATOR_AGENT_TOKEN=your_agent_token \
  --restart unless-stopped \
  ghcr.io/generator-labs/agent:latest
Deploy multiple instances for redundancy and load distribution. The system automatically balances monitoring requests across all running instances of the same agent.
Verifying Deployment
Once the agent container is running, it automatically connects to the Generator Labs platform and begins checking in. Navigate to Account ➡️ Agents and verify the agent status shows as "Active". The Instance(s) column displays the number of running containers currently connected.
If the agent doesn't appear as Active, verify the authentication environment variables are correct, confirm the container has outbound network access to the Generator Labs platform, and check container logs for errors.
Assigning Agents to Profiles
To use a monitoring agent for certificate checks, assign it to a monitoring profile. Navigate to Certificate Monitoring ➡️ Profiles and either create a new profile or edit an existing one. Enable Use Internal Monitoring Agent(s) and select one or more agents from the list. All monitors using that profile will perform checks through the selected agents.
Multiple agents can be assigned to a single profile. The system automatically load balances requests between them and provides failover if one agent becomes unavailable. This ensures reliable monitoring even if individual agent instances restart or experience connectivity issues. See best practices for guidance on when to use monitoring agents.
Maintenance and Updates
Monitor the agent status regularly through the agents list. If an agent shows as inactive and timeout alerts are enabled, you'll receive notifications. Update agent containers by pulling the latest image version from the GitHub container registry and redeploying with the same authentication credentials.
Remove agents that are no longer needed by deleting them from the agents list. Before deleting an agent, verify it's not assigned to any active monitoring profiles or update those profiles to use alternative agents.