Connecting Your Microsoft Account
Microsoft has replaced the old SNDS automated-access keys with a new sign-in based API. Instead of pasting an access key, you now connect your Microsoft account directly. If you previously added an SNDS key, you'll need to reconnect using the steps below.
Once you have SNDS access for your IP ranges, connect them from RBL Monitoring ➡️ SNDS.
Start the connection
Click Add SNDS Connection, enter a Display Name, then click Sign in with Microsoft. A new browser tab opens for the Microsoft sign-in.
Authorize access
Sign in with the Microsoft account that owns your SNDS data and approve the request. We only ask for read access to your SNDS reports. We can never send mail, change your account, or read your mailbox content.
Paste the result back
Microsoft only allows its SNDS sign-in to return to a local address, so after you approve, your browser will show a "can't reach this page" error for http://localhost. This is expected. Copy the full address from your browser's address bar, paste it into the connection sidebar, and click Connect.
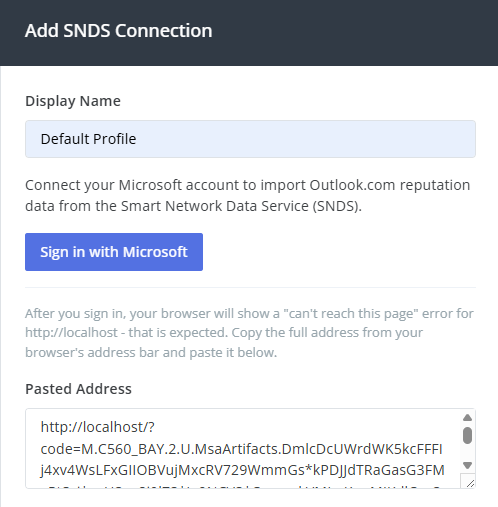
Once connected, we refresh your access automatically, so you will not need to sign in again unless access is revoked. The first import begins within a few minutes.
Managing connections
On the SNDS page each connection shows its status, the connected Microsoft account, and when it last imported. Select a connection to rename it, and use the footer actions to Resume, Pause, Re-authorize, or Delete it.
If a connection's access is ever revoked at Microsoft, its status changes to Re-authorize. Select it and use Re-authorize to sign in again; monitoring resumes automatically and no data is lost.
You can add up to 10 SNDS connections to your account.