Custom Endpoint
The Custom Endpoint contact type lets you define an HTTP(s) endpoint URL that we'll POST to, in the place of sending an email or message.
While similar to Webhooks, the Custom Endpoint contact type is different than a Webhook in a few key ways:
- Custom Endpoints only receive high-level summary details related to checks, while Webhooks will receive full details.
- Custom Endpoints are subject to Scheduling Settings on the Contact, while Webhooks are not. Note: Scheduling Settings currently only apply to RBL Monitoring and are being phased out.
- Custom Endpoints are subject to Contact Group settings, including time-of-day settings, while Webhooks are not.
Payload
The format of the body of the message delivered to your endpoint URL uses JSON. The exact set of fields depends on the event_type. For a regular alert (RBL listing event, certificate event, etc.):
{
    "event_sid": "TAdde245352fc842d68c63f6693981be30",
    "event_type": "contact.trigger",
    "title": "RBL Listing Event",
    "message": "1 hosts listed, 0 hosts delisted. See link for more details.",
    "url": "https:\/\/rbltrack.com\/fFMa1S"
}
When a new contact is being confirmed, the payload includes an additional authcode field. The same value is also the last path segment of the confirmation URL, so you can either click through manually or use the authcode field to confirm the contact programmatically using the API:
{
    "event_sid": "EA47b3e1c2a8f5469d8e21043b6c8fa192",
    "event_type": "contact.confirm",
    "title": "Confirm your Contact",
    "message": "You were added as a new Generator Labs contact. Click the link below to confirm, or simply ignore this message to decline.",
    "url": "https:\/\/portal.generatorlabs.com\/main\/confirm\/contact\/COede245352fc842d68c63f6693981be30\/a4f3b2",
    "authcode": "a4f3b2"
}
Code Example
Below is a simple PHP example that shows how to ingest the RAW POST JSON data:
<?php

$json = file_get_contents('php://input');
if ($json !== false)
{
    $data = json_decode($json);
    print_r($data);
}
This would return:
Array
(
    [event_sid] => TAdde245352fc842d68c63f6693981be30
    [event_type] => contact.trigger
    [title] => RBL Listing Event
    [message] => 1 hosts listed, 0 hosts delisted. See link for more details.
    [url] => https://rbltrack.com/fFMa1S
)
Adding a Contact
You can add a Custom Endpoint contact from the Contacts ➡️ Manage ➡️ Contacts section of the Portal.
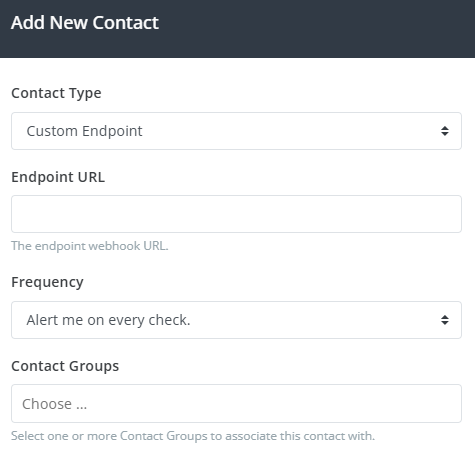
Select Custom Endpoint from the Contact Type drop-down, enter your webhook URL in the Endpoint URL field, select a Frequency, and select one or more Contact Groups to associate with this new contact.
After clicking Add Contact, you'll receive a confirmation message with a confirmation link that you'll need to click on to confirm your contact.
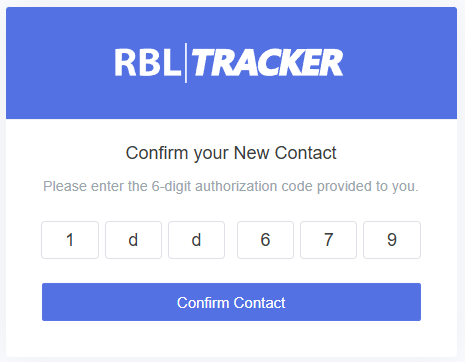
If you don't receive the confirmation message for some reason, you can also click the Resend Auth option to resend the confirmation message. Once a contact is confirmed, it will be ready to use.
The Frequency setting only applies to RBL Monitoring and will be removed in a future update. Other products such as Certificate Monitoring have their own alerting options.